How to Make a DIY Pet Bed That Your Pet Will Love
Look, I get it. Your pet is basically your fur baby. So, why not spoil them with something homemade? Forget store-bought beds that cost an arm and a leg—how to make a DIY pet bed that your pet will love can be a fun (and ridiculously satisfying) project. And trust me, I’ve learned a thing or two about what works and what doesn’t. Spoiler alert: my first attempt was a total disaster, but let’s not dwell on that.
Anyway, here’s the kicker: it’s actually way easier than you think, and your pet will totally appreciate it. (Or at least they’ll appreciate the extra nap time, if nothing else.)
Why DIY a Pet Bed?
So, before we jump into how to make a DIY pet bed that your pet will love, let’s take a step back and talk about why you’d even bother. I mean, it’s just a bed, right? Wrong. Well, maybe. But trust me, making your own bed for Fido or Fluffy comes with some serious perks.
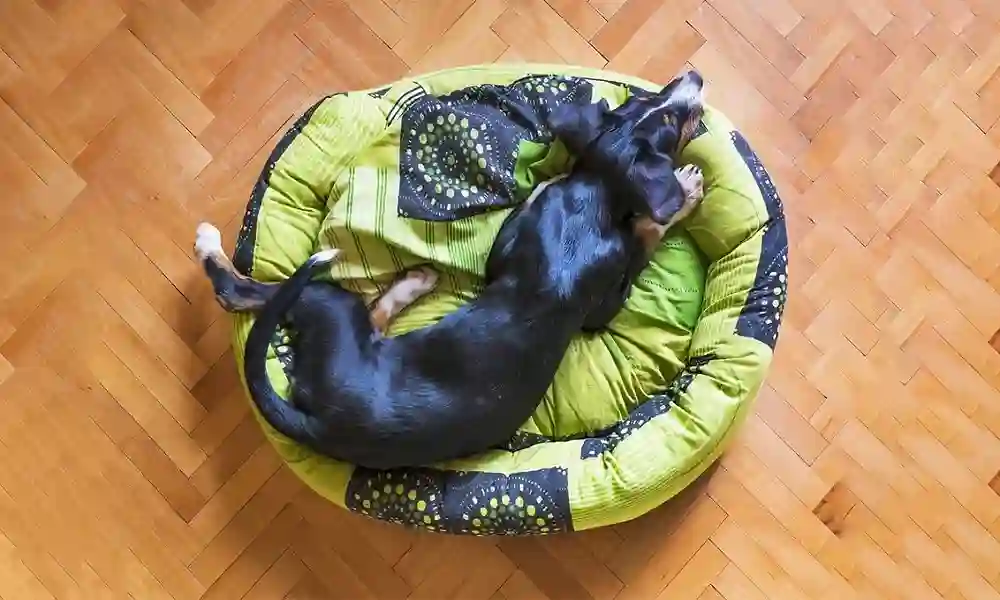
For one, you can customize it to your pet’s exact preferences. I mean, my dog, Biscuit, refuses to sleep on anything that doesn’t have at least two pillows and a blanket wrapped around it. Spoiled? Maybe. But making how to make a DIY pet bed that your pet will love lets you ensure it’s the perfect fit.
- Size matters: You can craft a bed for your pet’s exact measurements.
- Budget-friendly: A DIY bed won’t drain your wallet like those fancy-pants ones in the store.
- Custom comfort: You can choose fabrics your pet loves, like fleece or cotton (because we all know they have very specific preferences).
- It’s a personal touch: Add your pet’s name, or better yet, sew a heart on it to remind them who their favorite human is. (Hint: It’s you.)
Now, let’s get down to it. How do you actually make a DIY pet bed that your pet will love?
Step-by-Step: How to Make a DIY Pet Bed That Your Pet Will Love
Okay, time to grab your tools and put on your craft hat. This isn’t that complicated—I promise. I mean, if I can pull it off after the whole “DIY hammock for my hamster” fiasco (RIP, Gertrude), you can totally do this.
Step 1: Gather Your Materials
Here’s what you’ll need to get started:
- Fabric (think soft, comfy materials like fleece, cotton, or if you’re feeling fancy, canvas)
- Stuffing (anything from old pillows to memory foam will do)
- Scissors (don’t use your fancy kitchen scissors like I did. Just trust me)
- Sewing machine (or just needle and thread if you’re the patient type)
- Measuring tape (because guess what? Pets come in all shapes and sizes)
- Optional: Zippers, buttons, Velcro, or even a snazzy name tag
Pro tip: I learned the hard way that picking a fabric that smells like you can help your pet settle in faster. Biscuit loves anything that smells like my sweatshirt. I once made a blanket out of an old hoodie—he’s been obsessed with it ever since.
Step 2: Measure Your Pet (Yes, Really)
Listen, this is more important than you think. You can’t just guess. I tried this once for my old dog, Rambo, and his “bed” ended up looking like a glorified coffee table. So, grab a tape measure and measure your pet while they’re comfortably napping (it’s way easier than trying to wrestle them awake).
Here’s a rough guideline for sizes:
- Tiny dogs or cats: 18”x24”
- Medium-sized pets: 24”x36”
- Big dogs or pets who like to stretch: 30”x42” or bigger
The key here is to get a bed that’s roomy enough for your pet to stretch, but not too big that they feel like they’re lost in it. It’s about finding that sweet spot. And trust me, how to make a DIY pet bed that your pet will love starts with getting this measurement right.
Step 3: Cut and Sew the Fabric
Now, let’s cut! You’ll need two identical fabric pieces for the top and bottom of the bed. I usually go for something soft and comfy like fleece. It’s like pet heaven, but better because you made it.
Here’s the basic process:
- Lay the fabric down and cut it to your pet’s measurements.
- Put the fabric pieces together (face-to-face) and sew three sides shut.
- Turn it inside out (hello, pretty side!) and stuff it with your stuffing of choice.
- Sew the last side shut.
Now, I could go all Martha Stewart on you and recommend making a whole bunch of fancy seams, but let’s be honest: I’ve never actually made anything that requires a “French seam.” Who has time for that? Keep it simple.
Not into sewing? No worries. You can easily glue the fabric together with some heavy-duty fabric adhesive. I did that once when I didn’t feel like sewing, and it worked just fine (despite my cat judging me).
Creative Twists for Your Pet Bed
Okay, now that you’ve got the basics down, let’s get creative! I’ll be honest, how to make a DIY pet bed that your pet will love doesn’t have to be basic. You can totally get wild with the designs.
Donut Bed:
My dog, Biscuit, is obsessed with curling up in a little ball. So, a donut-shaped bed works perfectly.
- Start with a circular base.
- Add a round bolster around the edge (this is where your pet can rest their head or curl up).
- Sew it all together.
It’s like a pet donut, and who doesn’t love donuts?
Crate Liner:
If your pet loves their crate (or needs to be crate trained), a simple crate liner is perfect. Just add a bit of padding and some quilt-style stitching, and you’re good to go. Bonus: It’s removable and washable. It’s like the Netflix of pet beds—no commitment required.
Upcycled Sweater Bed:
Have an old sweater lying around? Turn it into a bed. I did this for my cat, Tofu, and she loves it. Just sew the arms shut, stuff the body, and boom—cozy sweater nest.
Personalizing Your Pet Bed
Alright, we’ve covered the basics. But you know what makes a DIY pet bed extra special? The little touches. It’s the details that matter, y’all.
Add a Name Tag
This one is a no-brainer. You can sew your pet’s name onto the bed, or even iron it on. Makes it feel like it was made just for them.
A Toy Pocket
Got a pet who’s always carrying around their favorite toy? Sew a little pocket on the side of the bed. Bonus: It keeps all the toys contained in one place (instead of scattered around your house like I’ve got a rat infestation).
Non-Slip Bottom
I learned this one the hard way when Biscuit’s bed would slide around on the tile floor. I ended up adding some non-slip fabric underneath, which made a huge difference. It’s like your pet gets their own little rug that’s stuck in place.
Wrapping It Up: The Bed Your Pet Will Adore
So, there you have it. How to make a DIY pet bed that your pet will love isn’t as hard as it sounds. Whether you go for a plush donut, a crate liner, or an upcycled sweater, your pet will appreciate the effort—and the comfort. If Biscuit could talk, he’d thank me, but since he’s too busy napping, I guess I’ll take that as a compliment.
In the end, it’s not just about the bed—it’s about showing your pet how much they mean to you. I mean, if my first attempt at pet crafting (see: disaster) didn’t scare me off, I’m pretty sure anyone can make a bed their pet will love.
Happy crafting, y’all!