How to Build a DIY Raised Garden Bed
Building a plant bed for your domestic plant is one of the best ways to guarantee sound, flourishing plants all through the developing season. Whether you’re a fledgling cultivator or a prepared professional, a plant bed can be an great way to organize your plants, move forward soil quality, and diminish the strain of bowing over continually. Not to specify, it’s a straightforward end of the week extend that can lead to new vegetables, herbs, or blooms in no time. So, let’s jump into how to construct a DIY raised cultivate bed.
Choosing the Right Area for Your Raised Cultivate Bed
Before you begin gathering supplies, the to begin with step is choosing where your plant bed will go. In a perfect world, you need to select a area with bounty of sunlight—at slightest 6-8 hours of coordinate daylight per day. If you’re planting vegetables, this is significant for ideal development. Keep in mind, a few plants like verdant greens may endure a small shade, but others, like tomatoes or peppers, will require all the sun they can get.
Also, dodge regions with overwhelming foot activity or places that remain damp for long periods. A well-drained area is key to a effective raised cultivate bed. In conclusion, think approximately convenience—place your bed some place effectively available so you’re not walking over the yard each time you require to water.
Materials You’ll Require for Your Raised Plant Bed
Once you’ve picked your spot, it’s time to accumulate your materials. You can get imaginative with the sorts of materials utilized, but here’s a list of the nuts and bolts you’ll require for a basic cultivate bed:
- Wood: Cedar or redwood are prevalent choices since they’re safe to rot. You’ll require at slightest four boards of wood—two long ones and two brief ones. You can purchase pre-cut amble or have it cut to estimate at a neighborhood equipment store.
- Screws or nails: To hold the wood together, screws are the best choice since they will hold up longer than nails.
- Soil: The quality of your soil is critical. For your cultivate bed, it’s best to utilize a blend of compost, topsoil, and cultivate soil. This will guarantee your plants get the supplements they need.
- Landscape texture: This will offer assistance anticipate weeds from developing up through your cultivate bed whereas still permitting for legitimate drainage.
- Drill: For gathering the plant bed and securing the wood together.
- Saw (discretionary): If you require to cut the wood to size.
Step-by-Step Informational for Building a Raised Cultivate Bed
Step 1: Get ready the Area
Start by stamping out the zone where you need your cultivate bed to be. Utilize a tape degree and a few string to guarantee the zone is level. If the ground is uneven, you may require to level it out some time recently you begin building your cultivate bed.
Step 2: Cut the Wood
If you didn’t purchase pre-cut stumble, you’ll require to cut your wood to measure. For a essential rectangular plant bed, you’ll need two long sides (approximately 4 feet each) and two brief sides (almost 2 feet each). Degree twice, cut once—trust me, I’ve learned that lesson the difficult way. Once the pieces are cut, you’ll be prepared for assembly.
Step 3: Gather the Bed
Take your long and brief pieces of wood and organize them into a rectangle. Penetrate pilot gaps where the wood pieces meet at the corners. Secure the pieces together utilizing screws. If you’re feeling additional favor, you can indeed utilize corner brackets to make beyond any doubt everything remains square and secure.
At this point, you’ll have the outline of your cultivate bed prepared to go. If you’re making a bigger bed, you can construct different segments and interface them, but for most little ventures, this straightforward plan ought to do the trick.
Step 4: Line the Foot with Scene Fabric
To avoid weeds from popping up through your cultivate bed, line the foot of the outline with scene texture. Fair roll it out, and staple it to the interior of the cultivate bed. Be beyond any doubt to take off a few additional texture along the edges so you can overlay it over the sides for additional weed prevention.
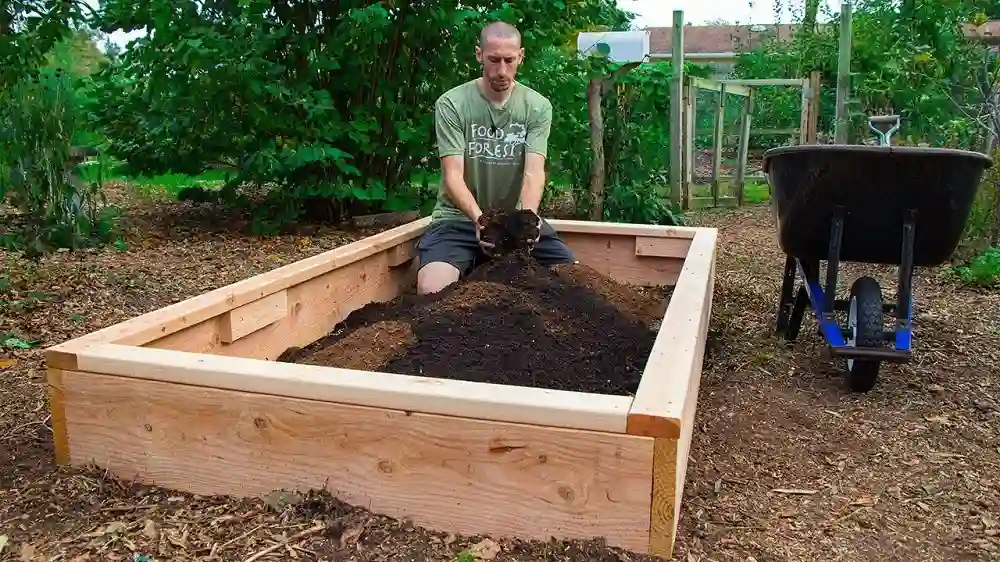
Step 5: Fill Your Bed with Soil
Now, for the fun portion: filling your plant bed with soil. Begin with a layer of compost to donate your plants a nutrient-rich establishment. At that point, include a blend of topsoil and cultivate soil to fill the rest of the bed. Point for a profundity of around 12-18 inches of soil, which ought to allow most plants sufficient room for their roots to grow.
Step 6: Plant Your Garden
Once your cultivate bed is filled with soil, it’s time to plant. Select your plants based on the sum of daylight your bed gets and the developing season. Herbs like basil, mint, and rosemary do well in raised beds, as do veggies like carrots, lettuce, and tomatoes. If you’re not beyond any doubt what to plant, check your neighborhood developing zone and get counsel from a cultivate center close you.
Step 7: Keep up and Water Your Bed
After your cultivate bed is planted, keep an eye on it for the to begin with few weeks to guarantee your plants are developing well. Water routinely, but maintain a strategic distance from overwatering, as raised beds tend to deplete rapidly. If you take note the soil drying out as well quick, you can include a layer of mulch on best to offer assistance hold moisture.
Tips for Fruitful Raised Plant Beds
- Add supplements routinely: Over time, your soil will lose supplements, so be beyond any doubt to beat it off with compost each year to keep your plants healthy.
- Use a trickle water system framework: Raised plant beds tend to dry out rapidly, so a dribble water system framework can offer assistance keep your plants hydrated without squandering water.
- Rotate your crops: Each season, attempt planting distinctive crops to avoid soil exhaustion and decrease bother buildup.
Final Thoughts
Building your claim DIY plant bed is a basic and fulfilling extend that can improve your domestic cultivate. With a small exertion and the right materials, you’ll have a durable bed prepared for planting in no time. Furthermore, it’s a incredible way to develop your claim nourishment, make strides your soil, and get your hands a small messy. Get prepared to appreciate a cultivate that looks awesome and thrives—one plant bed at a time!